
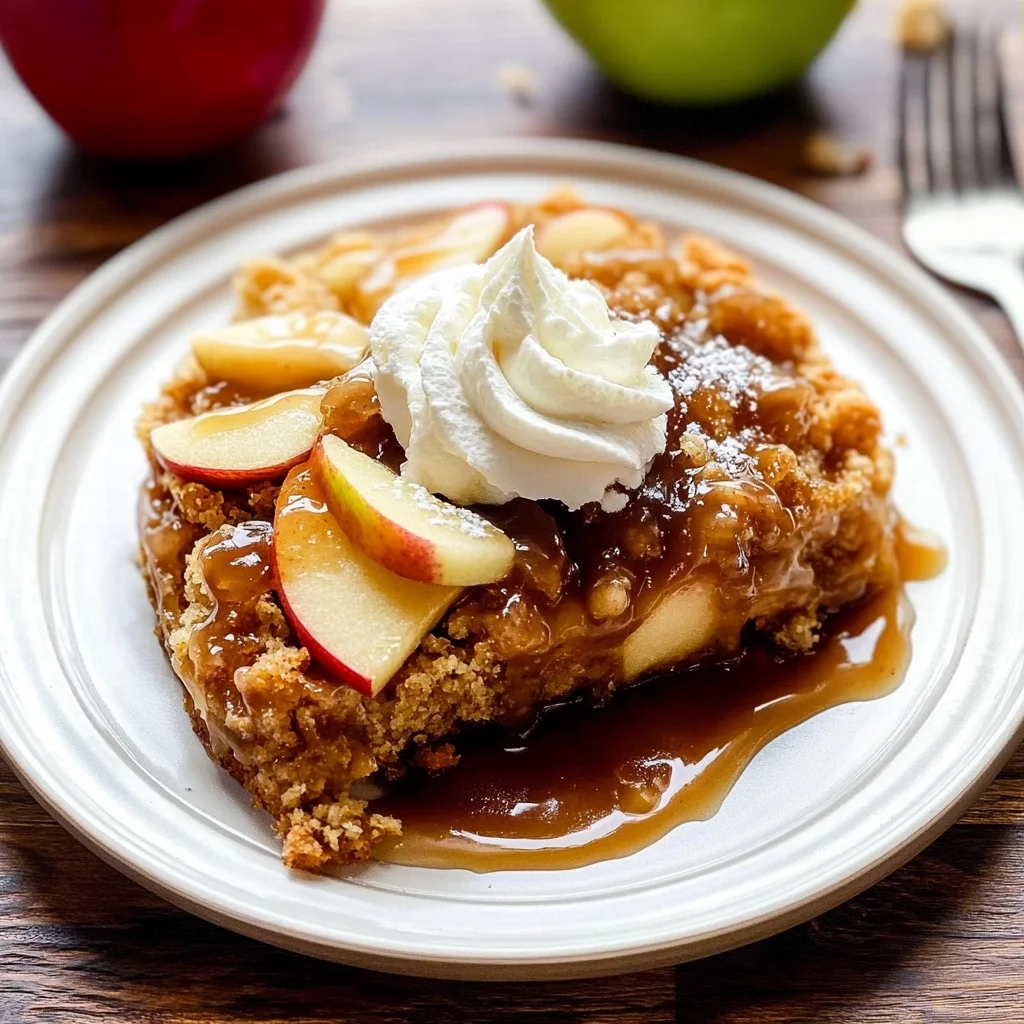

Imagine the sweet aroma of baked apples wafting through your kitchen, mingling with the warm scent of cinnamon and melted butter. The first bite reveals a delightful contrast between tender, caramelized apples and a crunchy oat topping that sings with every crunch, making apple desserts an irresistible treat for any occasion.
Growing up, my grandmother would whip up her famous apple crisp during family gatherings, creating memories as warm as the dessert itself. Whether it’s a cozy autumn evening or a festive holiday celebration, there’s an undeniable joy in sharing this comforting dessert that promises to make any moment feel special.
Why Will You Keep Making apple desserts?
Classic Apple Crisp is a delightful treat that everyone will adore!
- Sweetened apples: The combination of Granny Smith or Honeycrisp apples creates a perfect balance of tart and sweet, ensuring each bite is bursting with flavor.
- Warm spices: A hint of cinnamon and nutmeg adds warmth, making this dessert feel like a cozy hug.
- Crunchy topping: The oat and brown sugar topping brings an irresistible crunch that contrasts beautifully with the soft apple filling.
- Quick prep: In just 15 minutes, you can have this scrumptious dessert ready for the oven, making it a fantastic option for busy weeknights or surprise guests.
- Versatile serving: Serve it warm with a scoop of vanilla ice cream or drizzle with caramel sauce for a show-stopping dessert that pleases any crowd.
apple desserts Ingredients
- For the Filling
- 4 cups apples, peeled and sliced (Granny Smith or Honeycrisp recommended) – Choose tart apples for a delightful contrast to the sweet topping.
- 1 cup granulated sugar – Adjust based on apple sweetness to achieve the perfect balance in your apple desserts.
- 1 tablespoon lemon juice – Helps prevent browning and enhances the flavor of the apples.
- 1 teaspoon cinnamon – Adds warmth and spice, making your dessert even more comforting.
- 1 teaspoon nutmeg – Complements the cinnamon for a rich, aromatic experience.
- For the Topping
- 1 cup rolled oats – Creates a crunchy texture that pairs beautifully with tender apples.
- 1 cup all-purpose flour – Helps bind the topping together while providing structure.
- 1/2 cup brown sugar (packed) – Brings a rich, caramel-like sweetness to your crisp topping.
- 1/2 cup unsalted butter (melted) – Ensures a rich flavor and golden color in the topping.
- 1/2 teaspoon salt – Balances the sweetness and enhances all the flavors in this delicious dessert.
Step-by-Step apple desserts

1. Preheat the oven to 350°F (175°C).
Get your oven ready while you prepare the filling. This temperature will ensure a perfectly baked dessert with a golden topping.
2. Combine sliced apples, granulated sugar, lemon juice, cinnamon, and nutmeg in a mixing bowl.
Toss everything gently to coat the 4 cups of peeled and sliced apples evenly. The sweet and spicy aroma will fill your kitchen!
3. Transfer the apple mixture to a greased baking dish.
Make sure to spread it out evenly so every bite is bursting with flavor when it bakes.
For the Topping:
4. Mix rolled oats, flour, brown sugar, melted butter, and salt in another bowl until crumbly.
This combination creates that delightful crunchy topping that pairs beautifully with the soft apples below.
5. Spread the oat mixture evenly over the apple filling in the baking dish.
Ensure an even layer for consistent texture and taste throughout your dessert.
6. Bake in the preheated oven for 30 minutes or until the topping is golden brown and the apples are bubbly.
Keep an eye on it; you’ll know it’s done when you see that lovely color and hear the bubbling!
7. Let cool for a few minutes before serving.
This helps set everything and makes it easier to scoop out those warm apple delights.
Optional: Serve with vanilla ice cream for an extra touch of indulgence!
Exact quantities are listed in the recipe card below.
Expert Tips
- Apple Selection: Choose Granny Smith or Honeycrisp for a perfect balance of tartness and sweetness, enhancing your apple desserts.
- Sugar Adjustment: Taste your apples before adding sugar; if they’re sweet enough, reduce the sugar to avoid overly sweet filling.
- Prevent Browning: Always add lemon juice to your apple mixture right after slicing; it keeps those lovely slices from turning brown.
- Cinnamon & Nutmeg: Don’t skimp on spices! They elevate the flavor, making your apple desserts fragrant and comforting.
- Topping Consistency: Ensure the oat topping is crumbly but mixed well; too much butter can make it greasy instead of crunchy.
- Cooling Time: Let the dessert cool briefly before serving; this helps set the filling and makes for easier, cleaner servings.
How to Store and Freeze apple desserts
- Room Temperature: Store baked apple desserts in a cool, dry place for up to 2 days. Cover with a clean kitchen towel to keep the topping crisp.
- Fridge: For longer freshness, refrigerate your apple dessert in an airtight container for up to 5 days. This helps maintain flavor and texture.
- Freezer: Freeze leftovers for up to 3 months. Ensure they are tightly wrapped in plastic wrap and then placed in a freezer-safe container to prevent freezer burn.
- Reheating: To enjoy your dessert warm, reheat individual portions in the microwave for about 30 seconds or in a preheated oven at 350°F (175°C) for 10–15 minutes.
apple desserts Your Way
Feel free to let your creativity shine by customizing this delightful treat with these fun variations!
- Sweetener Swap: Replace granulated sugar with maple syrup or honey for a natural sweetness. Adjust the amount based on your taste preference. This will add a lovely depth of flavor and a hint of caramel that pairs beautifully with apples.
- Fruit Fusion: Mix in other fruits like pears or berries for added flavor and color. Combining different fruits creates a wonderful harmony of tastes and enhances the overall freshness of the dessert.
- Nutty Crunch: Add 1/2 cup of chopped nuts, such as walnuts or pecans, to the topping for extra texture. This nutty element adds a satisfying crunch that contrasts perfectly with the soft apple filling.
- Spice it Up: Experiment with spices like allspice or cardamom alongside cinnamon and nutmeg. A dash of these exotic spices can elevate the warmth and complexity of your dessert, making each bite more intriguing.
- Gluten-Free Option: Substitute all-purpose flour with almond flour or a gluten-free blend. This allows everyone to enjoy your creation without compromising on taste or texture, while still achieving that lovely crumbly topping.
- Zesty Twist: Incorporate some grated orange zest into the filling for a bright citrus note. The zing from the orange will complement the apples beautifully, adding an exciting twist to this classic dish.
- Caramel Drizzle: Drizzle warm caramel sauce over the finished dessert before serving for an indulgent touch. This rich addition will take your dessert to new heights and make it even more irresistible to family and friends.
Make Ahead Options

This apple crisp recipe is perfect for meal prep, allowing you to enjoy a warm and comforting dessert with minimal last-minute effort. You can easily prepare the filling in advance by peeling and slicing 4 cups of apples, mixing them with 1 cup of granulated sugar, 1 tablespoon of lemon juice, 1 teaspoon each of cinnamon and nutmeg, and then transferring the mixture to a greased baking dish. The topping can also be made ahead by combining 1 cup of rolled oats, 1 cup of all-purpose flour, 1/2 cup of packed brown sugar, 1/2 cup of melted unsalted butter, and 1/2 teaspoon of salt until crumbly. Both components can be refrigerated for up to 24 hours. When you’re ready to serve, simply preheat your oven to 350°F (175°C), spread the topping over the apple filling, and bake for about 30 minutes until golden brown. This way, you can have delicious apple desserts ready to go with just a little bit of prep!
apple desserts Recipe FAQs
What types of apples work best for this dessert?
Granny Smith and Honeycrisp apples are both excellent choices for this recipe. Granny Smith offers a tartness that balances the sweetness, while Honeycrisp adds a delightful crunch and natural sweetness. Feel free to mix varieties for a more complex flavor profile!
How can I adjust the sweetness of the filling?
If your apples are particularly sweet, you can reduce the granulated sugar from 1 cup to 3/4 cup or even 1/2 cup. Taste the apple mixture before baking; it should have a balanced flavor without being overly sweet.
Can I prepare this dessert in advance?
Absolutely! You can prepare the apple filling up to 24 hours in advance. Just store it in an airtight container in the refrigerator after mixing. When you’re ready to bake, simply assemble with the topping and pop it in the oven at 350°F (175°C) for 30 minutes.
What’s the best way to store leftovers?
Store any leftover apple dessert in an airtight container in the refrigerator for up to 3 days. To reheat, simply place it in a preheated oven at 350°F (175°C) for about 10-15 minutes until warmed through.
Can I freeze this apple dessert?
Yes, you can freeze it! Assemble the dessert but do not bake it. Cover tightly with plastic wrap and then aluminum foil, and store it in the freezer for up to 3 months. When you’re ready to enjoy it, thaw overnight in the fridge and bake as directed.
What if my topping is too dry and crumbly?
If your oat topping seems too dry, try adding a touch more melted butter or a splash of milk to moisten it slightly. The topping should be crumbly yet hold together when pressed; aim for that perfect balance before spreading it over your apples!


Leave a Comment