

Imagine sinking your fork into a slice of Cannoli Cake, where the creamy ricotta filling meets rich chocolate, creating a blissful dance of flavors that transports you straight to Italy. The soft, moist vanilla cake serves as the perfect backdrop, inviting you to savor each delectable bite while the sweet aroma wafts through the air, enticing everyone around.
This Cannoli Cake isn’t just dessert; it’s a celebration waiting to happen. Picture it gracing your table at family gatherings or cozy dinners with friends, sparking laughter and nostalgia as stories unfold. With every slice, you’ll find yourself reminiscing about cherished moments while eagerly anticipating the blissful taste that awaits.
Why Is Cannoli cake So Irresistibly Good?
Indulge in a unique twist on a classic dessert that marries the richness of ricotta and chocolate with moist vanilla layers. Effortless to make, this Cannoli Cake comes together in just 30 minutes of prep time, making it perfect for any occasion. Satisfy your sweet tooth with its creamy filling and delightful crunch from chopped pistachios. Impress your guests with its stunning presentation, and watch it disappear at every gathering!
Cannoli cake Ingredients
For the Cake
- 2 cups all-purpose flour – This provides the structure for your Cannoli cake, making it light and fluffy.
- 1 cup granulated sugar – Sweetens the cake, enhancing the flavor of the ricotta filling.
- 1 tablespoon baking powder – Helps the cake rise for a soft, tender texture.
- 1/2 teaspoon salt – Balances sweetness and enhances overall flavor.
- 1/2 cup unsalted butter (softened) – Adds richness and moisture to the cake.
- 1 cup milk – Keeps the cake moist and contributes to its delicate crumb.
- 2 large eggs – Binds ingredients together while adding richness to the batter.
- 1 teaspoon vanilla extract – Infuses a warm, sweet aroma that pairs beautifully with the filling.
For the Filling
- 15 oz ricotta cheese (drained) – The star of this Cannoli cake, providing a creamy texture and authentic flavor.
- 1 cup powdered sugar – Sweetens the filling while keeping it smooth and creamy.
- 1/2 cup mini chocolate chips – Adds delightful bursts of chocolate in every bite.
- 1 teaspoon vanilla extract – Enhances the ricotta’s natural sweetness for a richer flavor profile.
- 1 cup heavy cream (whipped) – Lightens the filling and gives it a luxurious texture.
For the Topping
- 1/4 cup chopped pistachios (for garnish) – Offers a beautiful color contrast and nutty crunch on top of your Cannoli cake.
- 1/4 cup powdered sugar (for dusting) – Adds a touch of elegance and sweetness to finish off your dessert beautifully.
How to Make Cannoli cake
1. Preheat the oven to 350°F (175°C). Grease and flour two 9-inch round cake pans to ensure your cakes release easily after baking.
2. Combine flour, sugar, baking powder, and salt in a mixing bowl. This dry mix is the base of your delicious Cannoli cake, creating that perfect fluffy texture.
3. Add softened butter, milk, eggs, and vanilla extract. Beat with an electric mixer until smooth, about 2-3 minutes, making sure everything is well blended and creamy.
4. Divide the batter evenly between the prepared pans and smooth the tops with a spatula. This helps your cakes bake evenly for a beautiful presentation.
5. Bake for 25-30 minutes or until a toothpick inserted in the center comes out clean. The cakes should be golden brown on top and spring back when lightly pressed.
6. Cool the cakes in the pans for 10 minutes before transferring them to wire racks to cool completely. This step prevents sogginess while ensuring they maintain their shape.
For the Filling:
7. Mix ricotta cheese, powdered sugar, and vanilla extract in a mixing bowl until smooth. This creamy filling is what makes your Cannoli cake truly special!
8. Fold in whipped heavy cream and mini chocolate chips gently until well combined. The whipped cream adds lightness while chocolate chips provide delightful bursts of sweetness.
Assemble the Cake:
9. Place one layer on a serving plate once cooled completely. This will be the foundation of your stunning dessert masterpiece.
10. Spread half of the cannoli filling over the first layer evenly. Use an offset spatula for smoothness; it adds a wonderful creamy texture!
11. Top with the second cake layer and spread the remaining filling on top generously. Don’t be shy—this is where all that delicious flavor comes together!
12. Garnish with chopped pistachios and dust with powdered sugar before serving to add a pop of color and crunch that complements your Cannoli cake beautifully.
Optional: Garnish with chocolate shavings for an extra decadent touch.
Exact quantities are listed in the recipe card below.
Tips for the Best Cannoli cake
- Perfectly Greased Pans: Ensure your cake pans are well-greased and floured to prevent sticking, which can ruin your beautiful layers.
- Room Temperature Ingredients: Use room temperature butter, eggs, and milk for a smoother batter that will rise evenly and create a moist Cannoli cake.
- Do Not Overmix: Mix the batter just until combined to avoid a dense cake. Overmixing activates gluten in the flour, leading to toughness.
- Check Cake Doneness: Use a toothpick inserted into the center to check doneness; it should come out clean. Too much baking time can dry out your Cannoli cake.
- Cooling Time Matters: Allow cakes to cool completely before assembling. If warm, the filling may melt and lose its delightful structure.
- Filling Consistency: Make sure your ricotta is well-drained. Excess moisture can lead to a runny filling that won’t hold up on your Cannoli cake.
How to Store and Freeze Cannoli cake
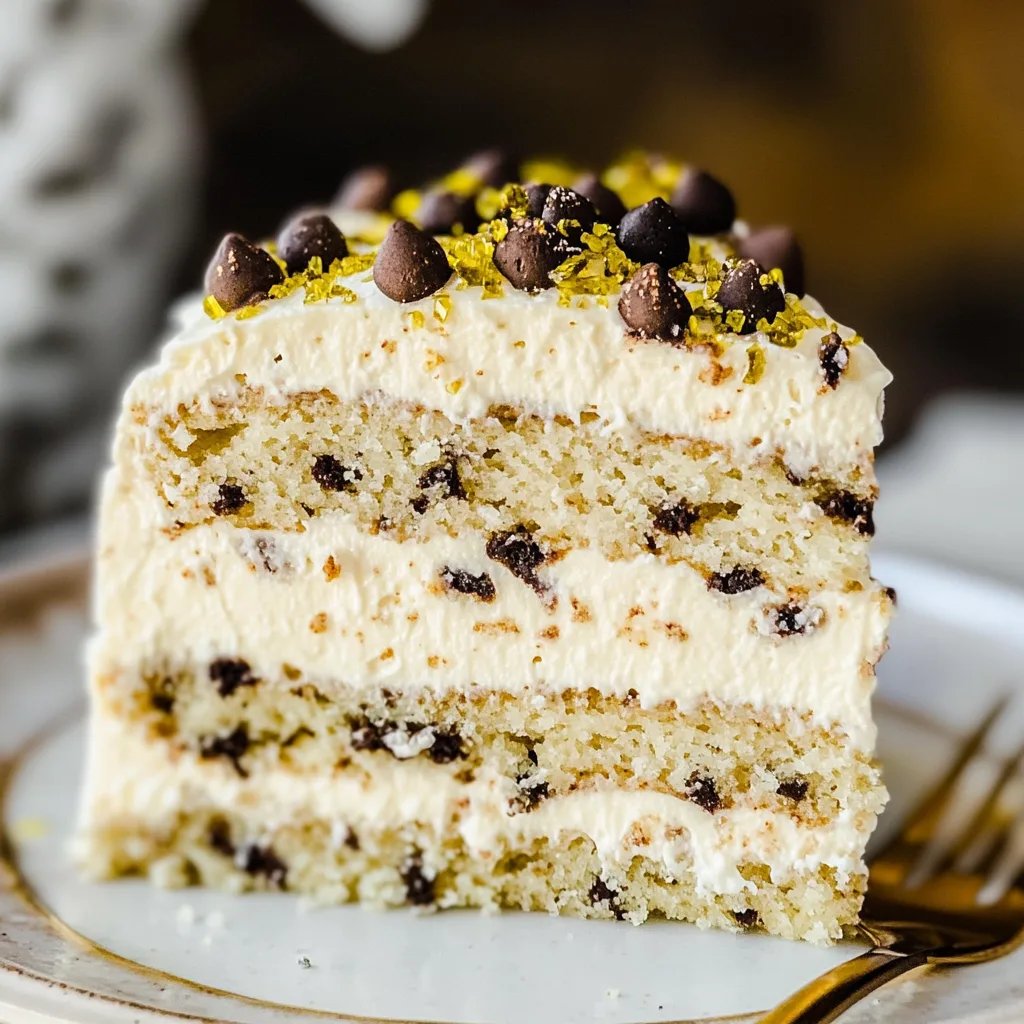
- Fridge: Store leftover Cannoli cake in an airtight container for up to 3 days. This helps maintain its moisture and flavor, especially with the creamy filling.
- Freezer: For longer storage, freeze slices of Cannoli cake wrapped tightly in plastic wrap and aluminum foil for up to 2 months. Thaw in the fridge overnight before enjoying.
- Reheating: If you prefer your cake slightly warm, gently reheat individual slices in the microwave for about 10-15 seconds. Enjoy the delightful creaminess fresh from the oven!
- Garnish Storage: Keep chopped pistachios and powdered sugar separate at room temperature in airtight containers. This ensures they remain crunchy and fresh when ready to serve.
Cannoli cake Your Way
Feel free to unleash your creativity and make this delightful dessert uniquely yours!
- Gluten-Free: Substitute all-purpose flour with a 1:1 gluten-free flour blend for a deliciously light cake. The texture remains moist and fluffy, ensuring everyone can enjoy it without compromise.
- Lemon Zest: Add the zest of one lemon to the cake batter for a refreshing citrus twist. This bright flavor will elevate the rich filling, making every bite feel like sunshine.
- Nutty Delight: Incorporate finely ground almonds or hazelnuts into the batter for a unique nutty flavor. This subtle addition creates an inviting depth that complements the sweetness of the ricotta filling.
- Chocolate Cake Base: Swap out vanilla cake for chocolate cake by using cocoa powder in place of some flour. This decadently chocolatey version will satisfy even the most intense cravings!
- Fruit-Filled Layers: Add layers of fresh berries or sliced bananas between the cake layers for added freshness. These fruity bursts will bring a lovely contrast to the creamy filling, creating a harmonious balance.
- Spicy Kick: Mix in a pinch of cinnamon or even cayenne pepper into the ricotta filling for an unexpected spicy twist. The warmth from these spices will tantalize your taste buds and add an exciting layer of flavor.
- Vegan-Friendly: Use plant-based butter, almond milk, and flax eggs instead of regular ingredients to create a vegan version. With careful swaps, you won’t lose any of the delightful flavors loved by many!
Make Ahead Options
This Cannoli cake is perfect for meal prep, allowing you to savor its delightful flavors without the last-minute rush. You can prepare the cake layers up to 24 hours in advance; just bake them, let them cool completely, and then wrap tightly in plastic wrap to retain moisture. The rich filling can be made 1-2 days ahead as well—just mix the ricotta cheese with powdered sugar and vanilla extract, then fold in the whipped heavy cream and mini chocolate chips, storing it in an airtight container in the fridge. When you’re ready to serve, simply assemble the cake by layering one cake on a serving plate, spreading half of the filling over it, topping with the second layer, and finishing with the remaining filling. Garnish with chopped pistachios and a dusting of powdered sugar right before serving for a fresh presentation! This way, you save time while ensuring your Cannoli cake remains as delicious as ever.
Cannoli cake Recipe FAQs
What can I use instead of all-purpose flour?
You can substitute all-purpose flour with a gluten-free flour blend if you’re looking for a gluten-free option. Alternatively, cake flour will yield a lighter texture for your cannoli cake. Just remember that different flours may absorb moisture differently, so you might need to adjust the liquid slightly.
How should I store leftover cannoli cake?
Store any leftover cannoli cake in an airtight container in the refrigerator for up to 3 days. The cool temperature will help maintain the freshness of the ricotta filling. If you want to keep it longer, consider freezing individual slices wrapped tightly in plastic wrap and then foil for up to 2 months.
Can I freeze this cannoli cake?
Yes, you can freeze the cannoli cake! It’s best to freeze the layers before assembling them. Wrap each layer in plastic wrap and then in aluminum foil, and they can be stored in the freezer for up to 2 months. Just ensure you let them thaw completely before adding the filling.
What if my cake layers are uneven?
Don’t worry! If your cake layers turn out uneven, simply level them with a serrated knife after they’ve cooled completely. It’s a great way to create a perfect base for your decadent cannoli filling, ensuring every slice looks as beautiful as it tastes!
How many servings does this recipe make?
This delightful cannoli cake serves about 8 people. It’s perfect for gatherings or special occasions where you want to impress your guests with something a little different than traditional desserts!
Can I make this recipe dairy-free?
Absolutely! For a dairy-free version, substitute unsweetened almond milk or coconut milk for regular milk and use dairy-free butter alternatives in place of unsalted butter. Look for vegan ricotta cheese options available at specialty stores or online to complete your dairy-free filling!
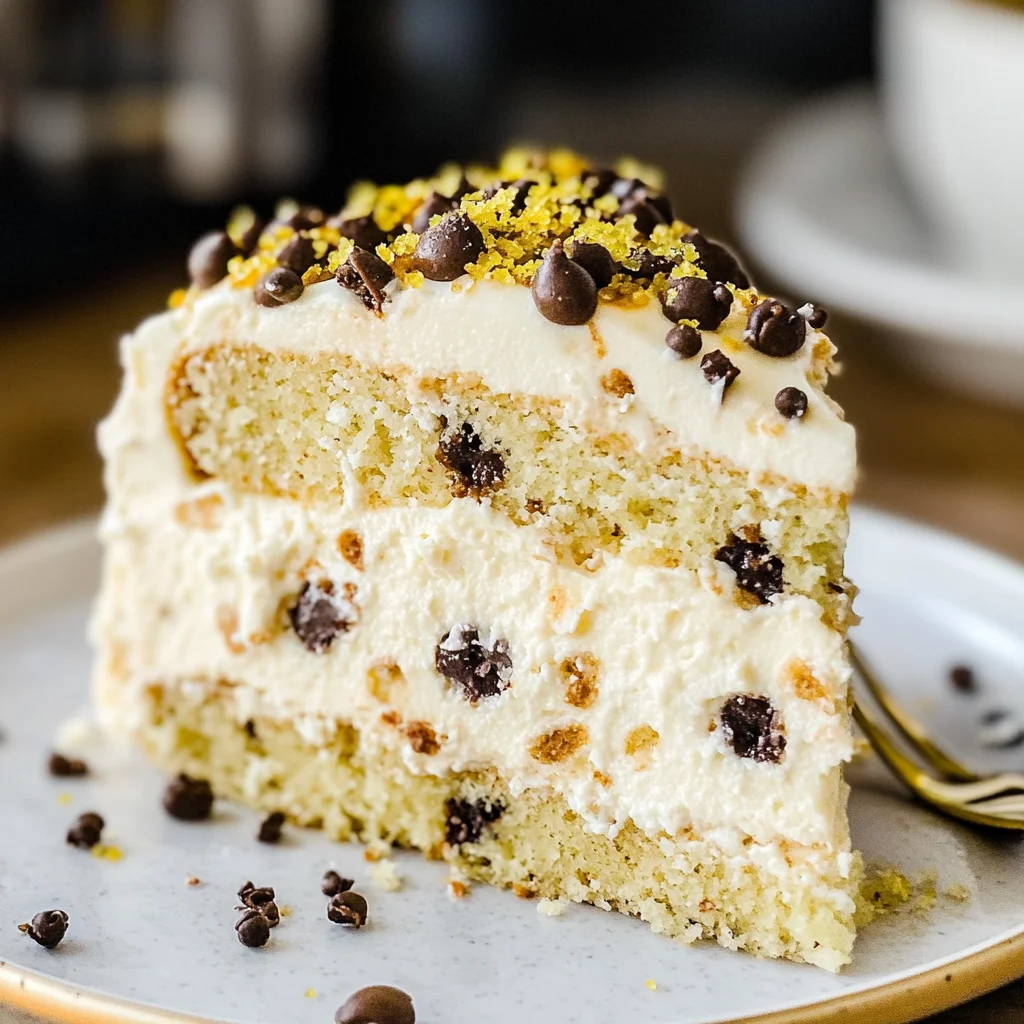
Cannoli Cake
Ingredients
Method
- Preheat the oven to 350°F (175°C). Grease and flour two 9-inch round cake pans.
- In a mixing bowl, combine flour, sugar, baking powder, and salt.
- Add softened butter, milk, eggs, and vanilla extract. Beat with an electric mixer until smooth.
- Divide the batter evenly between the prepared pans and smooth the tops.
- Bake for 25-30 minutes or until a toothpick inserted in the center comes out clean.
- Let the cakes cool in the pans for 10 minutes, then transfer to wire racks to cool completely.
- In a mixing bowl, combine ricotta cheese, powdered sugar, vanilla extract, and mix until smooth.
- Gently fold in the whipped heavy cream and mini chocolate chips until well combined.
- Once the cakes are completely cool, place one layer on a serving plate.
- Spread half of the cannoli filling over the first layer.
- Top with the second cake layer and spread the remaining filling on top.
- Garnish with chopped pistachios and dust with powdered sugar before serving.


Leave a Comment