


Imagine the mouthwatering aroma of a perfectly roasted chicken wafting through your home, the crispy skin glistening with savory herbs and spices. As you take a bite, the juicy meat bursts with flavor, each morsel infused with the rich essence of beer can chicken, making it an unforgettable centerpiece for any gathering.
Picture this: a sunny backyard barbecue where laughter mingles with the sizzle of the grill, and that legendary beer can chicken steals the show. Whether it’s a casual get-together or a festive celebration, this dish promises to elevate your culinary game and leave your guests raving about those unbeatable flavors long after the last bite.
Why Is beer can chicken So Irresistibly Good?
Juicy and Flavorful: This method ensures every bite is bursting with flavor, thanks to the beer-infused steam.
Easy Prep: With just 15 minutes of hands-on time, you can set it and forget it while it cooks!
Crowd-Pleaser: Impress your guests with a stunning presentation that’s as delicious as it looks.
Versatile Seasoning: Customize the spice blend to suit your taste or try different beers for unique twists.
Perfectly Crispy Skin: The upright roasting method gives you that crave-worthy crispy exterior.
Time-Saving: In just 90 minutes, you’ll have a show-stopping meal ready to serve!
beer can chicken Ingredients
For the Chicken
- 1 whole whole chicken (about 4-5 pounds) – Choose a fresh, quality bird for a juicy and flavorful result in your beer can chicken.
For the Seasoning
- 2 tablespoons olive oil – This helps the seasoning adhere and adds a lovely richness to the skin.
- 1 tablespoon paprika (smoked or regular) – Provides a beautiful color and a mild, smoky flavor that enhances the overall taste.
- 1 tablespoon garlic powder – Adds a delicious depth of flavor that complements the chicken beautifully.
- 1 tablespoon onion powder – Offers a subtle sweetness and savory note that rounds out the seasoning profile.
- 1 teaspoon salt (to taste) – Essential for enhancing all the other flavors; adjust according to your preference.
- 1 teaspoon black pepper (to taste) – Adds just the right amount of warmth and spice to elevate the dish.
For the Beer
- 1 can beer (lager or ale) – The beer infuses moisture and flavor into the chicken as it cooks, making every bite succulent.
Step-by-Step beer can chicken
1. Preheat the grill to medium-high heat (about 375°F to 400°F). This sets the stage for a perfectly roasted chicken, ensuring a crispy skin and juicy meat.
2. Mix together the olive oil, paprika, garlic powder, onion powder, salt, and pepper in a small bowl. This seasoning blend will create an aromatic crust that infuses flavor into your whole chicken.
3. Rub the seasoning mixture all over the chicken, including under the skin for more flavor. Make sure each part is well-coated; this enhances the taste as it cooks.
4. Open the can of beer and drink or pour out half of it. Feel free to add some of the seasoning mix to the beer for an extra flavor boost while keeping your beer can chicken moist.
5. Place the beer can in the cavity of the chicken, ensuring it stands upright. This innovative method helps steam cook the chicken from within, resulting in tender and juicy meat.
6. Carefully place the chicken on the grill, using a chicken holder if available. Keep a close eye as it cooks; you want that golden brown color developing beautifully!
7. Close the grill lid and cook for about 1.5 hours, or until the internal temperature reaches 165°F in the thickest part of the thigh. Patience is key—let those flavors mingle!
8. Remove the chicken from the grill and let it rest for 10-15 minutes before carving. This resting period allows juices to redistribute, making every bite succulent.
Optional: Drizzle with fresh herbs or lemon juice before serving for an added burst of freshness!
Exact quantities are listed in the recipe card below.
Tips for the Best beer can chicken
- Choose the Right Beer: Lagers or ales work best, as their flavors complement the chicken. Avoid overly hoppy beers that may overpower the dish.
- Season Generously: Don’t skimp on the seasoning! Ensure you rub it under the skin and all over to maximize flavor throughout your beer can chicken.
- Stability is Key: Use a chicken holder if available to prevent tipping. A stable setup ensures even cooking and prevents spills.
- Temperature Matters: Always check the thickest part of the thigh for doneness. Aim for 165°F to avoid dry meat; undercooking could lead to food safety issues.
- Rest Before Carving: Let the chicken rest for 10-15 minutes after grilling. This allows juices to redistribute, resulting in a juicier final product.
- Avoid Opening Too Soon: Resist the urge to peek while cooking. Keeping the grill closed maintains consistent heat, leading to perfectly cooked beer can chicken.
How to Store and Freeze beer can chicken

- Fridge: Store leftover beer can chicken in an airtight container for up to 3 days to maintain its juicy flavor and moisture.
- Freezer: Wrap portions of beer can chicken tightly in plastic wrap and foil, then freeze for up to 3 months for best quality.
- Reheating: To reheat, thaw in the fridge overnight, then warm in the oven at 350°F (175°C) until heated through, about 20-30 minutes.
- Room Temperature: Avoid leaving beer can chicken out for more than 2 hours; bacteria can develop quickly at room temperature.
beer can chicken Your Way
Feel free to take this classic dish and make it your own with these delightful variations!
- Herb-Infused: Add fresh herbs like rosemary or thyme to the seasoning for a fragrant twist. These herbs enhance the overall flavor, bringing a refreshing aroma that will fill your kitchen as it roasts.
- Spicy Kick: Mix in cayenne pepper or chili powder to the seasoning blend for added heat. This brings a delightful warmth that complements the juicy chicken, making each bite an exciting experience.
- Citrus Zing: Squeeze in some lemon or orange juice and zest into the olive oil before coating. The citrus brightens the dish, balancing the savory flavors and adding a lively touch to every mouthful.
- Sweet & Savory: Incorporate brown sugar into the seasoning mix for a hint of sweetness. This creates a beautiful caramelization on the skin, giving that perfect contrast to the savory spices.
- Smoky Flavor: Use a smoked beer instead of regular lager or ale for an intense smoky flavor. This adds depth and richness, creating a uniquely complex taste profile that will impress your family and friends.
- Garlic Lover’s Delight: Increase garlic powder to 2 tablespoons for an extra garlicky punch. The intensified garlic flavor seeps into the meat, making it irresistible for any garlic enthusiast.
- Asian Twist: Substitute beer with ginger ale and add soy sauce in the seasoning for an Asian-inspired version. The sweetness of ginger ale combined with umami from soy sauce creates an enticing fusion of flavors.
- Mediterranean Flair: Use olive oil infused with herbs de Provence and add olives or sun-dried tomatoes around the base of the chicken. This variation lends a vibrant Mediterranean touch that transforms your roast into something truly special.
Make Ahead Options
Preparing beer can chicken is a fantastic way to streamline your meal prep, making it perfect for busy weeknights or gatherings. You can season the whole chicken with olive oil, paprika, garlic powder, onion powder, salt, and pepper up to 24 hours in advance. Simply rub the seasoning mixture all over the chicken, including under the skin for maximum flavor. Additionally, you can open the beer can and pour out half of it, adding some of the leftover seasoning mix to infuse even more taste. When you’re ready to grill, just preheat your grill to medium-high heat and carefully position the seasoned chicken upright on the beer can. Cook it for about 1.5 hours until it reaches an internal temperature of 165°F in the thickest part of the thigh, then let it rest for 10-15 minutes before carving. By prepping ahead, you save valuable time while still serving a delicious and juicy beer can chicken that your family will love!
Your beer can chicken Questions, Answered
What type of beer should I use for beer can chicken?
You can use any lager or ale that you enjoy! A classic choice is a light lager, which complements the chicken’s flavors well. If you want to experiment, try a hoppy IPA for a more robust flavor profile. Just remember to choose something you’d like to drink too!
How do I ensure my chicken stays juicy while cooking?
To keep your chicken juicy, make sure to rub the seasoning mixture under the skin and coat the outside thoroughly with olive oil. This not only adds flavor but also helps retain moisture during cooking. Cooking at a consistent medium-high heat of 375°F to 400°F for about 90 minutes will also help achieve a perfectly juicy chicken.
Can I store leftover beer can chicken?
Absolutely! Once your beer can chicken has cooled down, you can store leftovers in an airtight container in the refrigerator for up to 3-4 days. For the best flavor and texture, reheat it in the oven at 350°F until warmed through.
Is it possible to freeze beer can chicken?
Yes, you can freeze beer can chicken! Just make sure it’s completely cooled before wrapping it tightly in plastic wrap or aluminum foil followed by placing it in a freezer-safe bag. It will keep well in the freezer for about 2-3 months. When you’re ready to enjoy it again, thaw it in the refrigerator overnight before reheating.
What if my chicken isn’t cooking evenly?
If your beer can chicken isn’t cooking evenly, check that your grill is properly preheated and that heat distribution is even. Try rotating the chicken halfway through cooking if you’re using indirect heat. Additionally, always ensure the internal temperature reaches at least 165°F in the thickest part of the thigh for safe consumption.
How many servings does this recipe provide?
This delicious beer can chicken recipe serves about 4 people, making it perfect for family dinners or gatherings with friends. With each serving around 400 calories, you’re not just feeding hungry bellies; you’re serving up joy and comfort straight from your grill!
Beer Can Chicken
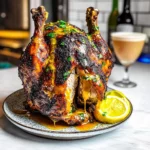
A flavorful and juicy chicken roasted upright on a beer can, infusing it with moisture and flavor.
Chicken
- 1 whole whole chicken (about 4-5 pounds)
Seasoning
- 2 tablespoons olive oil (for coating)
- 1 tablespoon paprika (smoked or regular)
- 1 tablespoon garlic powder
- 1 tablespoon onion powder
- 1 teaspoon salt (to taste)
- 1 teaspoon black pepper (to taste)
Beer
- 1 can beer (lager or ale)
Preparation
- Preheat the grill to medium-high heat (about 375°F to 400°F).
- In a small bowl, mix together the olive oil, paprika, garlic powder, onion powder, salt, and pepper.
- Rub the seasoning mixture all over the chicken, including under the skin for more flavor.
- Open the can of beer and drink or pour out half of it. You can add some of the seasoning mix to the beer if desired.
- Place the beer can in the cavity of the chicken, ensuring it stands upright.
Cooking
- Carefully place the chicken on the grill, using a chicken holder if available.
- Close the grill lid and cook for about 1.5 hours, or until the internal temperature reaches 165°F in the thickest part of the thigh.
- Remove the chicken from the grill and let it rest for 10-15 minutes before carving.
Ensure the chicken is cooked thoroughly for food safety. You can experiment with different seasonings and types of beer for varied flavors.


Leave a Comment