
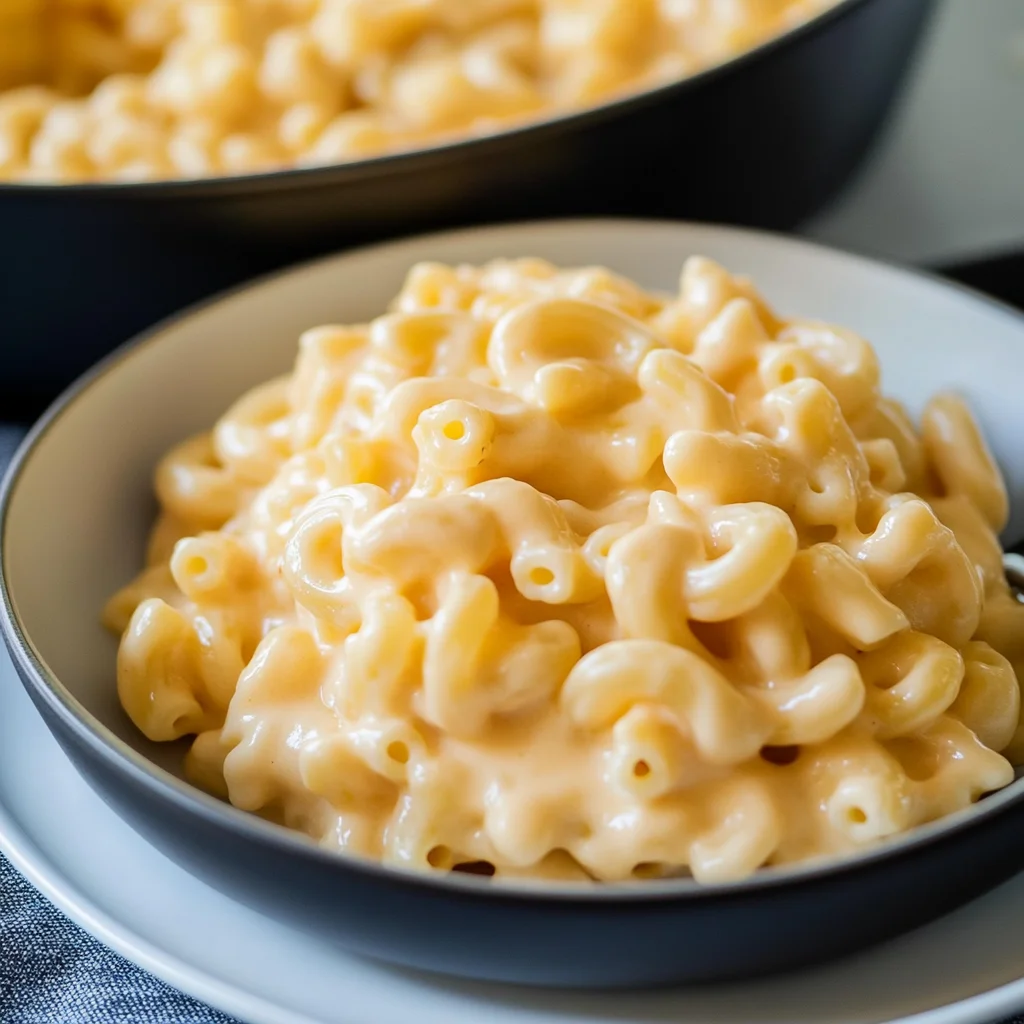

Picture this: a bubbling pot of homemade mac and cheese, its creamy cheese sauce glistening under the warm kitchen light, inviting you to take that first heavenly bite. The aroma of rich cheddar mingles with a hint of buttery goodness, instantly transporting you back to childhood days spent gathering around the table with family, where laughter and comfort food reigned supreme.
Remember those rainy afternoons when the world outside turned gray, but inside your home, a dish of homemade mac and cheese brought warmth and joy? This cheesy delight is not just a meal; it’s an experience that turns any ordinary day into a cozy celebration. Whether it’s a family gathering or a solo movie night, the anticipation of that first forkful promises an explosion of flavor that will make your taste buds dance with delight.
Why Does Everyone Love Homemade Mac and Cheese?
Creamy texture: This dish boasts a rich, velvety cheese sauce made from a perfect blend of cheddar and Gruyère, delivering a flavor explosion in every bite.
Quick and easy: With just 10 minutes of prep and 20 minutes of cook time, you can whip up this comfort food classic anytime!
Versatile options: Swap out pasta shapes or add your favorite ingredients like bacon or veggies to make it your own.
Crowd-pleaser: Whether it’s a family dinner or a potluck, this Homemade Mac and Cheese is always a hit with both kids and adults alike!
Time-saving: No need for complicated steps—just melt, mix, and bake for a delicious meal that comes together effortlessly!
Homemade Mac and Cheese Ingredients
For the Pasta
- 8 ounces Elbow Macaroni (or any pasta shape of your choice) – This classic pasta shape holds the cheesy sauce beautifully, but feel free to use your favorite type.
For the Cheese Sauce
- 2 tablespoons Butter (unsalted) – Adds richness and flavor to the sauce, enhancing the overall creaminess.
- 2 tablespoons All-Purpose Flour – Used for thickening the sauce, ensuring it clings perfectly to each piece of pasta.
- 2 cups Milk (whole or 2%) – Whole milk gives a creamier texture, but 2% is a great lower-fat option.
- 2 cups Cheddar Cheese (shredded) – Provides that classic sharp flavor and gooey texture we all love in Homemade Mac and Cheese.
- 1 cup Gruyère Cheese (shredded) – Adds a nutty depth of flavor; feel free to substitute with more cheddar if preferred.
- 1 teaspoon Mustard Powder (optional) – A pinch of mustard powder enhances the cheese’s flavor without being overpowering.
- 1/2 teaspoon Salt (to taste) – Season as needed to balance and enhance all the flavors in your dish.
- 1/4 teaspoon Black Pepper (to taste) – Adds a subtle kick; adjust according to your spice preference.
For the Topping
- 1/2 cup Breadcrumbs (preferably panko) – Panko breadcrumbs create an extra crispy topping that contrasts beautifully with the creamy pasta.
- 2 tablespoons Parmesan Cheese (grated) – Enhances flavor with its salty, umami notes, adding complexity to the dish.
- 1 tablespoon Olive Oil (for drizzling) – Helps achieve a golden brown crust when baked; you can also use melted butter if desired.
Directions: Homemade Mac and Cheese
1. Boil Pasta: Bring a large pot of salted water to a rolling boil. Add 8 ounces of elbow macaroni (or your preferred pasta shape) and cook according to package instructions until al dente, usually about 7-9 minutes. Drain and set aside.
2. Melt Butter: In a saucepan, melt 2 tablespoons of unsalted butter over medium heat. Stir in 2 tablespoons of all-purpose flour and cook for about 1 minute while stirring constantly, creating a roux.
3. Whisk in Milk: Gradually whisk in 2 cups of whole or 2% milk, continuing to stir until the mixture thickens and bubbles, which should take around 5-7 minutes.
4. Add Cheeses: Remove the saucepan from heat and stir in 2 cups of shredded cheddar cheese and 1 cup of shredded Gruyère cheese until melted and smooth. For added flavor, mix in 1 teaspoon of mustard powder, followed by salt and pepper to taste.
5. Preheat Oven: Preheat your oven to 350°F (175°C). In a large bowl, combine the cooked pasta with the creamy cheese sauce, mixing well until every piece is coated.
6. Prepare Topping: Transfer the pasta mixture into a baking dish. In a small bowl, mix together 1/2 cup of panko breadcrumbs with 2 tablespoons of grated Parmesan cheese, then sprinkle this over the top. Drizzle with 1 tablespoon of olive oil for that golden finish.
7. Bake: Place your dish in the preheated oven and bake for about 20 minutes or until the top is golden brown and crispy, filling your home with an irresistible aroma.
Optional: For an extra crunch, consider adding some chopped herbs on top before serving!
Exact quantities are listed in the recipe card below.
Tips for the Best Homemade Mac and Cheese
- Pasta Perfection: Use elbow macaroni for classic texture, but feel free to experiment with other shapes like shells or cavatappi for added fun.
- Cheese Choices: For a richer flavor, mix different cheeses. Gruyère adds nuttiness, while sharp cheddar provides that comforting taste we all love.
- Sauce Consistency: Stir your milk into the flour mixture gradually to avoid lumps. A smooth sauce is key to creamy Homemade Mac and Cheese.
- Seasoning Matters: Don’t skip the mustard powder; it enhances the cheese’s flavor beautifully. Taste and adjust salt and pepper for a balanced dish.
- Crispy Topping: Use panko breadcrumbs for an extra-crunchy topping. Drizzling with olive oil before baking ensures golden perfection without burning.
How to Store and Freeze Homemade Mac and Cheese

- Fridge: Store leftover Homemade Mac and Cheese in an airtight container for up to 3 days. Ensure it’s completely cooled before sealing to maintain freshness.
- Freezer: For longer storage, freeze the mac and cheese in a freezer-safe container for up to 2 months. Layer parchment paper between portions for easy separation.
- Reheating: To reheat, thaw overnight in the fridge if frozen. Warm in a saucepan over low heat, adding a splash of milk to restore creaminess, or microwave in short intervals until heated through.
- Baking: If you prefer a crispy topping, re-bake at 350°F (175°C) for about 20 minutes after reheating. Drizzle with olive oil before baking for extra crunch!
Homemade Mac and Cheese Variations
Feel free to explore these delightful twists that will elevate your creamy delight into something uniquely yours!
- Gluten-Free: Use gluten-free pasta and a cornstarch slurry instead of all-purpose flour for a smooth sauce. This allows everyone to enjoy the comforting goodness without compromise, making it a hit with gluten-sensitive friends.
- Spicy Kick: Add diced jalapeños or a splash of hot sauce to the cheese sauce for a zesty burst of flavor. This spicy variation brings a surprising warmth that pairs beautifully with the creamy cheese.
- Veggie Boost: Stir in steamed broccoli or roasted cauliflower before baking for added nutrition and texture. The veggies not only enhance the dish’s visual appeal but also provide a satisfying crunch amidst the creamy pasta.
- Smoky Flavor: Incorporate smoked cheddar or add a few drops of liquid smoke to your cheese sauce for depth. This twist delivers an irresistible smoky undertone that transforms your classic comfort food into something bold and exciting.
- Herbed Delight: Mix in fresh herbs like thyme or basil for aromatic freshness. A sprinkle of vibrant green throughout adds both flavor and visual charm, inviting you to savor every bite.
- Creamy Vegan: Substitute dairy with cashew cream and nutritional yeast for a rich, vegan version. You’ll be amazed at how this plant-based alternative can deliver that same comforting essence while catering to vegan diets!
- Cheesy Trio: Combine different cheeses like fontina and gouda along with cheddar for a flavor explosion. Each cheese brings its own unique character, crafting a layered taste experience in every forkful.
- Crunchy Topping: Swap breadcrumbs for crushed potato chips or tortilla chips on top for an extra crunch. This unexpected twist adds texture and surprises everyone with its delightful crispiness!
Make Ahead Options
This Homemade Mac and Cheese is a fantastic meal prep option, ensuring you always have a comforting dish ready to go. You can prepare the cheese sauce ahead of time by melting the butter, stirring in the flour, and whisking in the milk until thickened—this can be done up to 3 days in advance. Store the sauce in an airtight container in the fridge. Likewise, cook your elbow macaroni and keep it refrigerated for up to 2 days. When you’re ready to serve, simply combine the cooked pasta with your prepped cheese sauce, transfer it to a baking dish, top with breadcrumbs mixed with Parmesan, drizzle with olive oil, and bake at 350°F (175°C) for about 20 minutes until golden brown and crispy. This way, you can enjoy homemade mac and cheese without the last-minute rush!
Homemade Mac and Cheese Recipe FAQs
Can I use a different type of pasta for this recipe?
Absolutely! While elbow macaroni is a classic choice, you can use any pasta shape you prefer—shells, penne, or even fusilli work beautifully. Just ensure to cook it according to the package instructions until al dente.
What should I do if my cheese sauce is too thick?
If your cheese sauce seems thicker than you’d like, simply whisk in a bit more milk—about 1-2 tablespoons at a time—until you reach your desired consistency. Keep stirring over low heat to combine smoothly.
How can I store leftovers?
Store any leftover homemade mac and cheese in an airtight container in the refrigerator for up to 3 days. To reheat, add a splash of milk and warm it gently on the stove or in the microwave to restore its creamy texture.
Can I freeze homemade mac and cheese?
Yes, you can freeze it! Allow the mac and cheese to cool completely before transferring it to a freezer-safe container. It will keep well for up to 2 months. When you’re ready to enjoy it again, thaw overnight in the fridge and reheat as mentioned above.
What are some good toppings besides breadcrumbs?
If you’re looking to switch things up, consider adding crispy bacon bits, sautéed garlic mushrooms, or even caramelized onions on top before baking. For a spicy kick, sprinkle some crushed red pepper flakes or paprika!
Is there a way to make this recipe healthier?
Certainly! You can substitute whole milk with low-fat milk or even unsweetened almond milk for fewer calories. Additionally, swapping out half of the cheese for pureed cauliflower or using whole grain pasta can boost nutrition without sacrificing flavor.
Homemade Mac and Cheese

A creamy and cheesy pasta dish that is a comfort food classic, perfect for any occasion.
Pasta
- 8 ounces Elbow Macaroni (or any pasta shape of your choice)
Cheese Sauce
- 2 tablespoons Butter (unsalted)
- 2 tablespoons All-Purpose Flour
- 2 cups Milk (whole or 2%)
- 2 cups Cheddar Cheese (shredded)
- 1 cup Gruyère Cheese (shredded)
- 1 teaspoon Mustard Powder (optional)
- 1/2 teaspoon Salt (to taste)
- 1/4 teaspoon Black Pepper (to taste)
Topping
- 1/2 cup Breadcrumbs (preferably panko)
- 2 tablespoons Parmesan Cheese (grated)
- 1 tablespoon Olive Oil (for drizzling)
Cook Pasta
- Bring a large pot of salted water to a boil. Add the elbow macaroni and cook according to package instructions until al dente. Drain and set aside.
Make Cheese Sauce
- In a saucepan, melt the butter over medium heat. Stir in the flour and cook for about 1 minute, stirring constantly.
- Gradually whisk in the milk, continuing to stir until the mixture thickens and bubbles.
- Remove from heat and stir in the cheddar and Gruyère cheeses until melted and smooth. Add mustard powder, salt, and pepper to taste.
Combine and Bake
- Preheat your oven to 350°F (175°C). In a large bowl, combine the cooked pasta with the cheese sauce and mix well.
- Transfer the mixture to a baking dish. In a small bowl, mix breadcrumbs with Parmesan cheese and sprinkle over the top. Drizzle with olive oil.
- Bake in the preheated oven for 20 minutes or until the top is golden brown and crispy.
For extra flavor, you can add cooked bacon or vegetables like broccoli or spinach to the pasta before baking.


Leave a Comment